Write Report Card Comments Faster With Templates
Writing comments for student report cards is a really challenging, time consuming task for teachers. It’s very normal for any given teacher to spend anywhere from a 20 to 40 hours completing report card comments. For specialist teachers, who are responsible for teaching across grade levels, this burden is even bigger. Some art and music teachers have reported needing to write comments for hundreds of students! I have interviewed several specialist teachers who must start writing report card comments a month in advance of their due date in order to finish them all on time.
Note, too, that this is in addition to all of the other work a teacher is normally expected to do: lesson planning, teaching classes, grading assignments, writing tests, supervising extracurricular activities… the list of demands on a teacher’s time goes on and on and on.
Given all this, it’s natural for any teacher to ask: what the heck can I do to speed up this process?
One easy, free way to accelerate writing report card comments is to make a comment template. This is a simple method that allows you to treat comment writing like an assembly line, rather than a creative process where you need to write every single comment from scratch. A comment template can speed up the process of writing report card comments dramatically.
What You’ll Need
This process requires a few software programs that you probably already use:
- A document editor, like Microsoft Word, or Google Docs, and
- A spreadsheet program, like Microsoft Excel, or Google Sheets,
That’s it!
Instructions
Step One: Think of Areas to Give Feedback
This is totally dependent on what grade and subject you teach. For example, a fifth grade math teacher might want to give feedback in the following areas:
- Number Sense
- Completing Assignments
- Test Readiness
- Learning Attitude/Growth Mindset
…and so on and so forth.
It’s also a good idea to have a stock Opening and Closing sentences, so that you don’t sound like a robot when you are writing comments.
Write this list down in a spreadsheet column!

Step Two: Write a short feedback blurb for each area in your list.
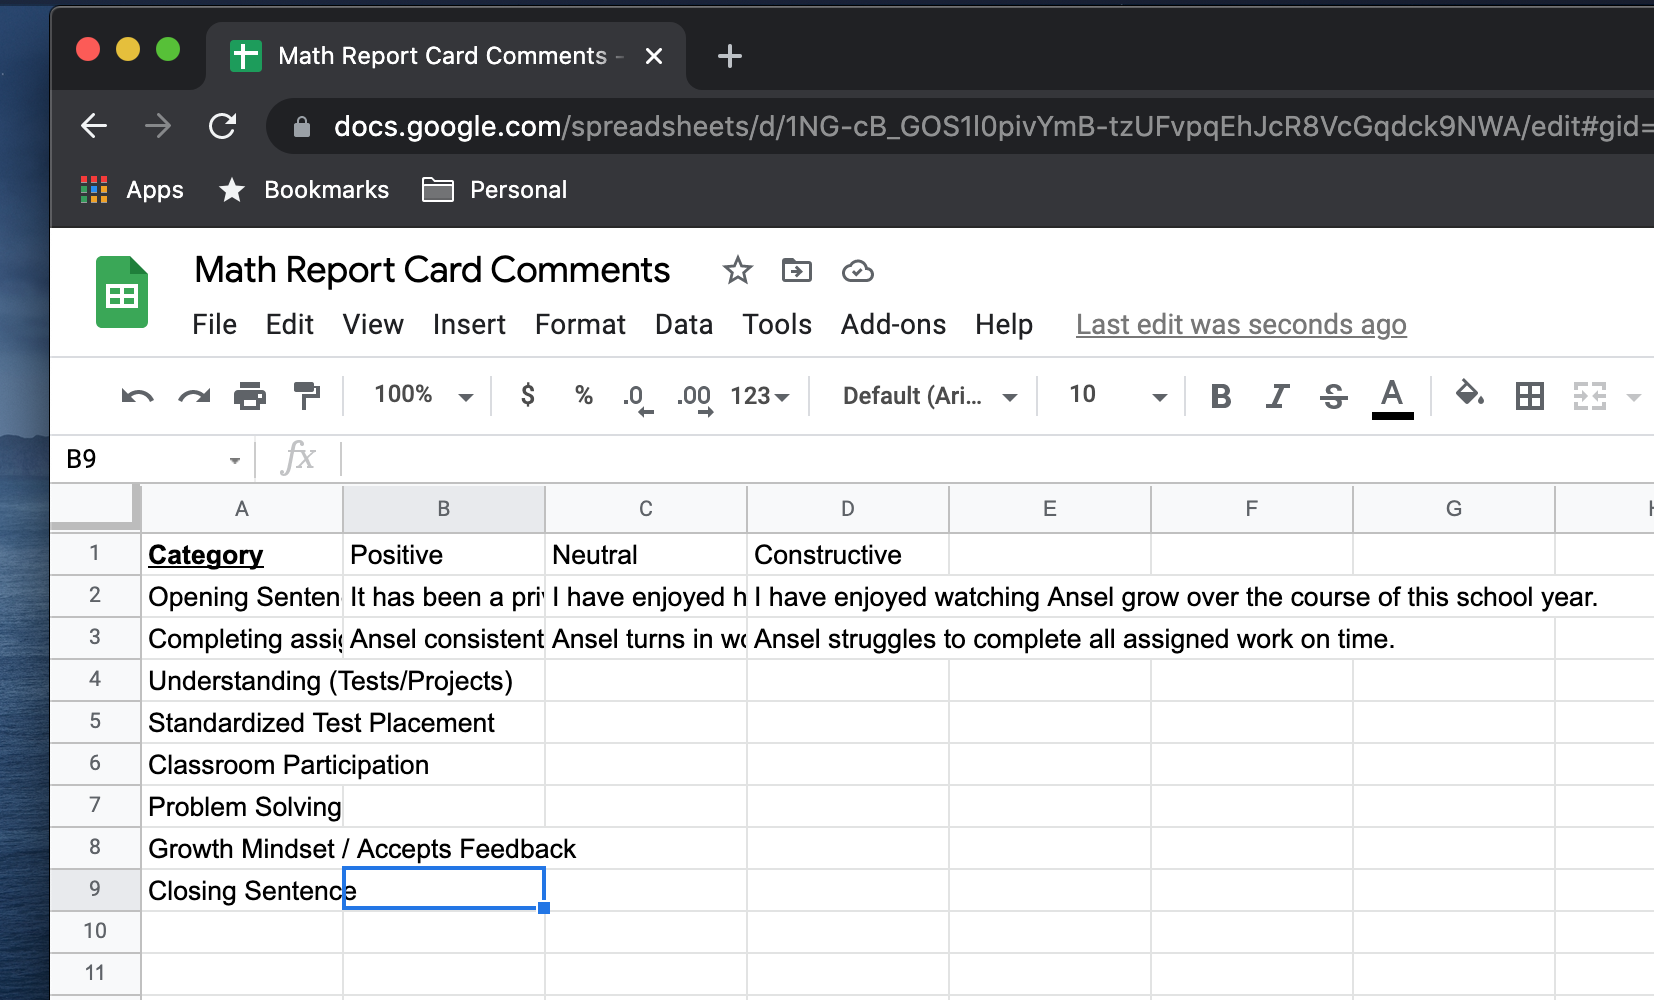
Now that you have a list of areas in which you want to give feedback, you’ll want to think of a few pieces of specific feedback to give students for each. I find that this is easiest to break up by tone or performance; thus, I write one sentence of positive feedback, one sentence of neutral feedback, and another sentence of constructive feedback.
We’ll use a hypothetical student from the math class we discussed earlier, Ansel Adams, as the recipient of some example feedback on Completing Assignments.
- Positive: “Ansel consistently turns in work that is complete, accurate and on-time. His work always shows his absolute best.”
- Neutral: “Ansel turns in work that is generally complete and accurate. He reliably turns in his assignments on time.”
- Constructive: “Ansel struggles to complete all assigned work on time.”
Plug each of these feedback items into their own column in the corresponding line of the spreadsheet.
Step Three: Repeat step two until you have stock feedback for all of your evaluation areas.
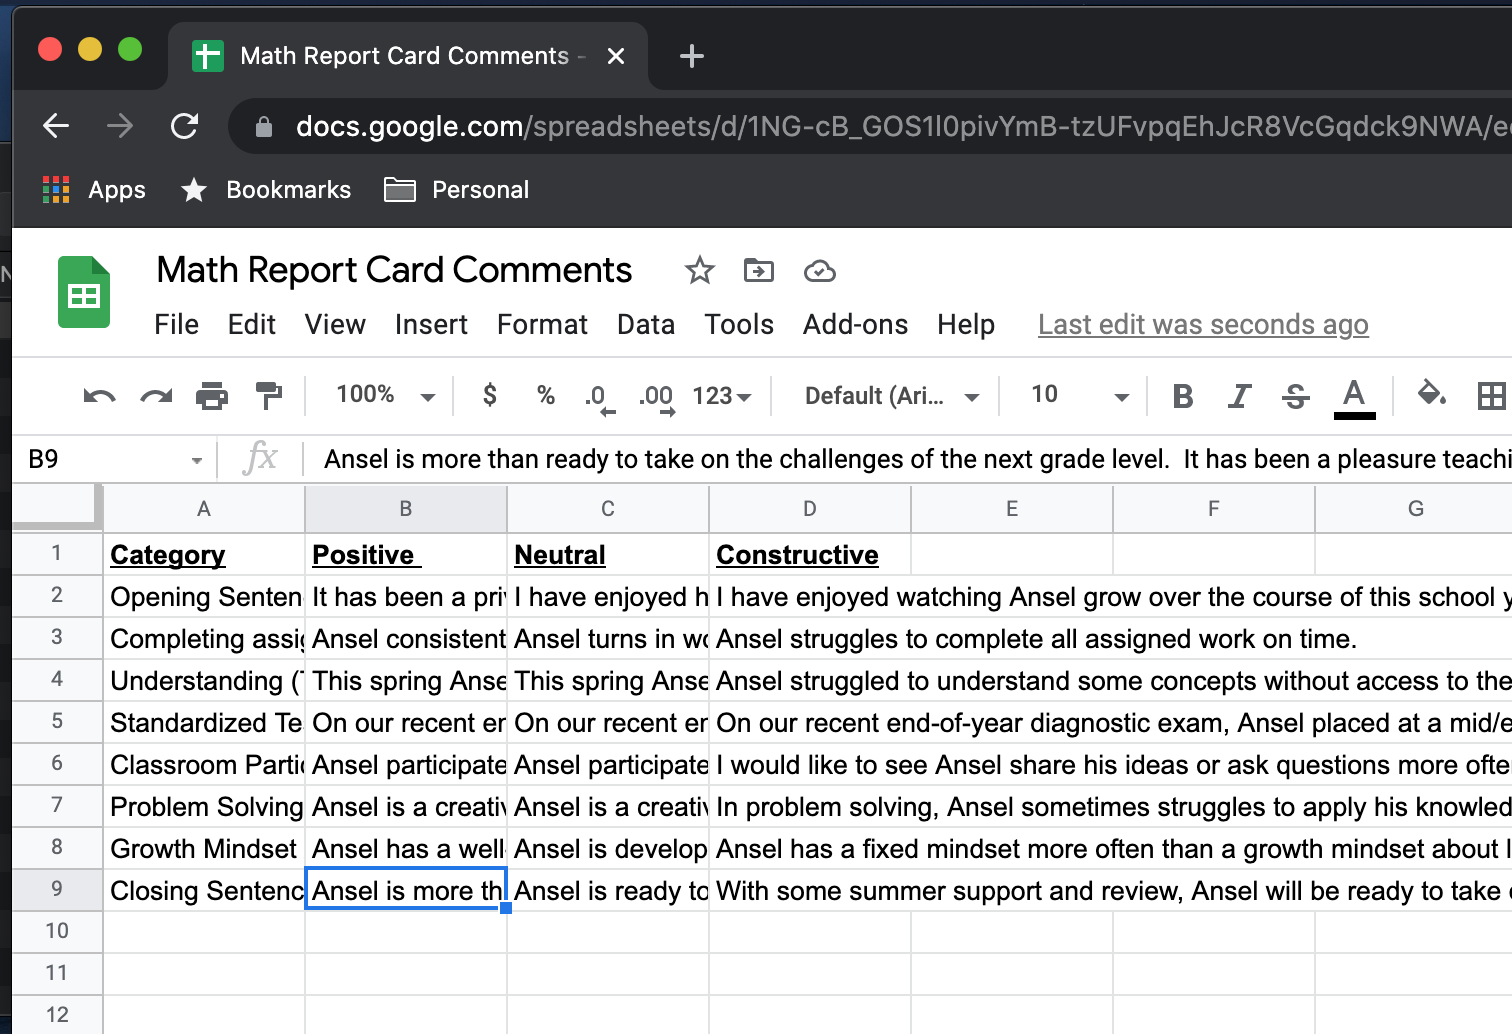
Step Four: Anonymize your feedback columns.
Since the ultimate goal of this exercise is to reuse these pieces of feedback as you write reports for each student, you’ll want to take this opportunity to scrub names out of your feedback template. This is really easy to do with a “Find and Replace” function built into a normal spreadsheet editor.
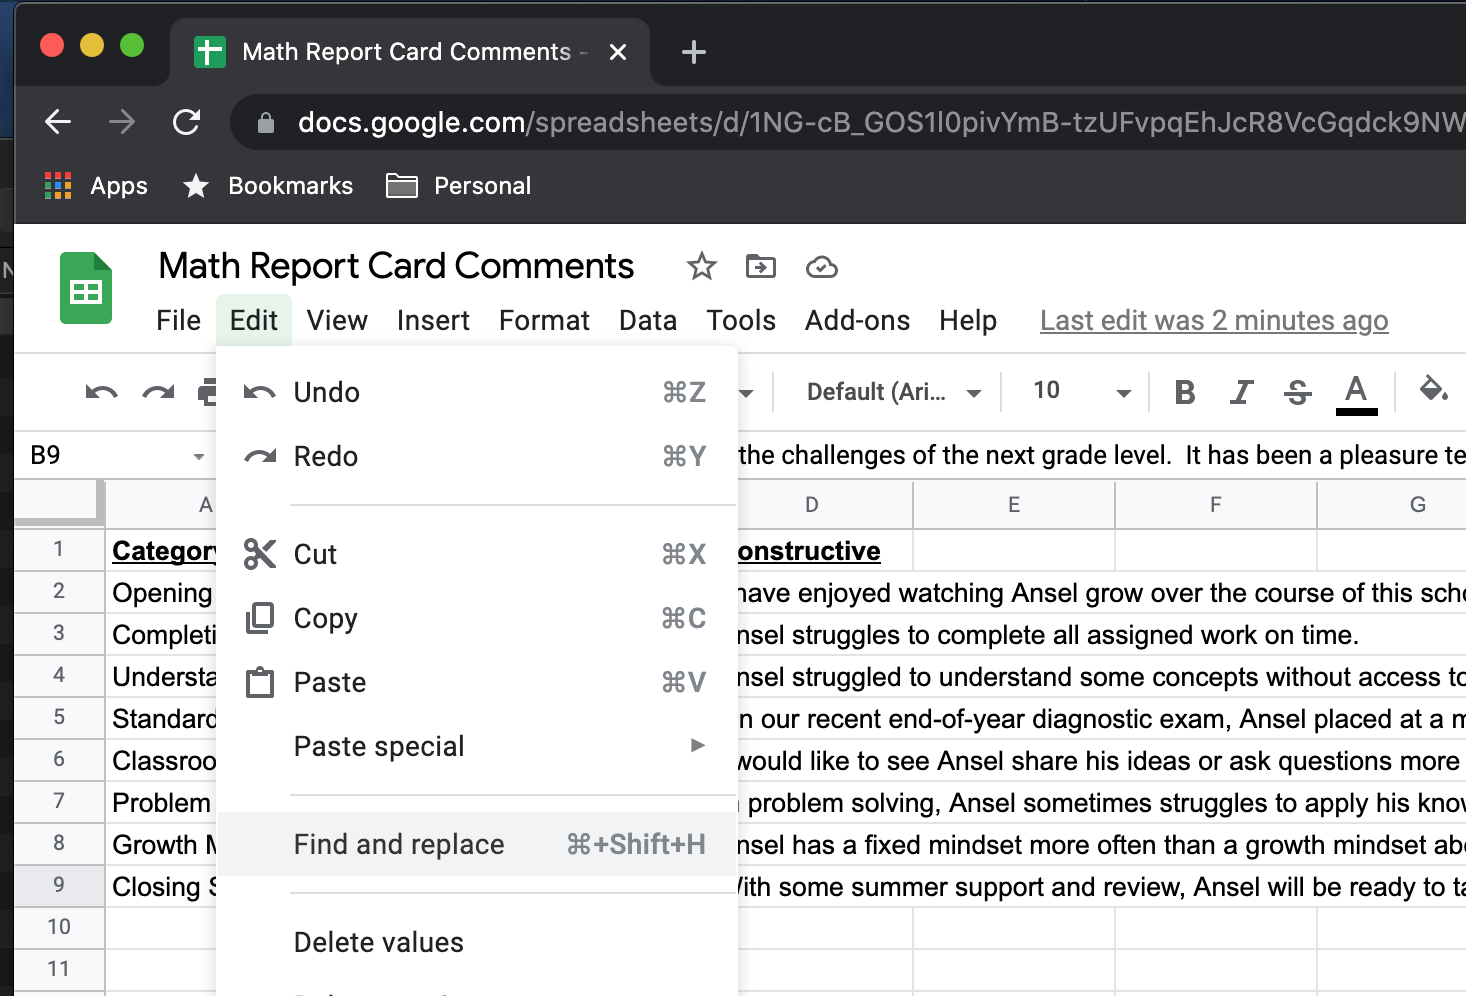
First, open the “Find and Replace” function in your spreadsheet program. The screenshot below shows how to do this for Google Sheets.
Next, use the program to find all instances of your student’s name. You’ll want to pick something nice and easy to replace your student’s name with. I’m using “{firstname}” in the example below.
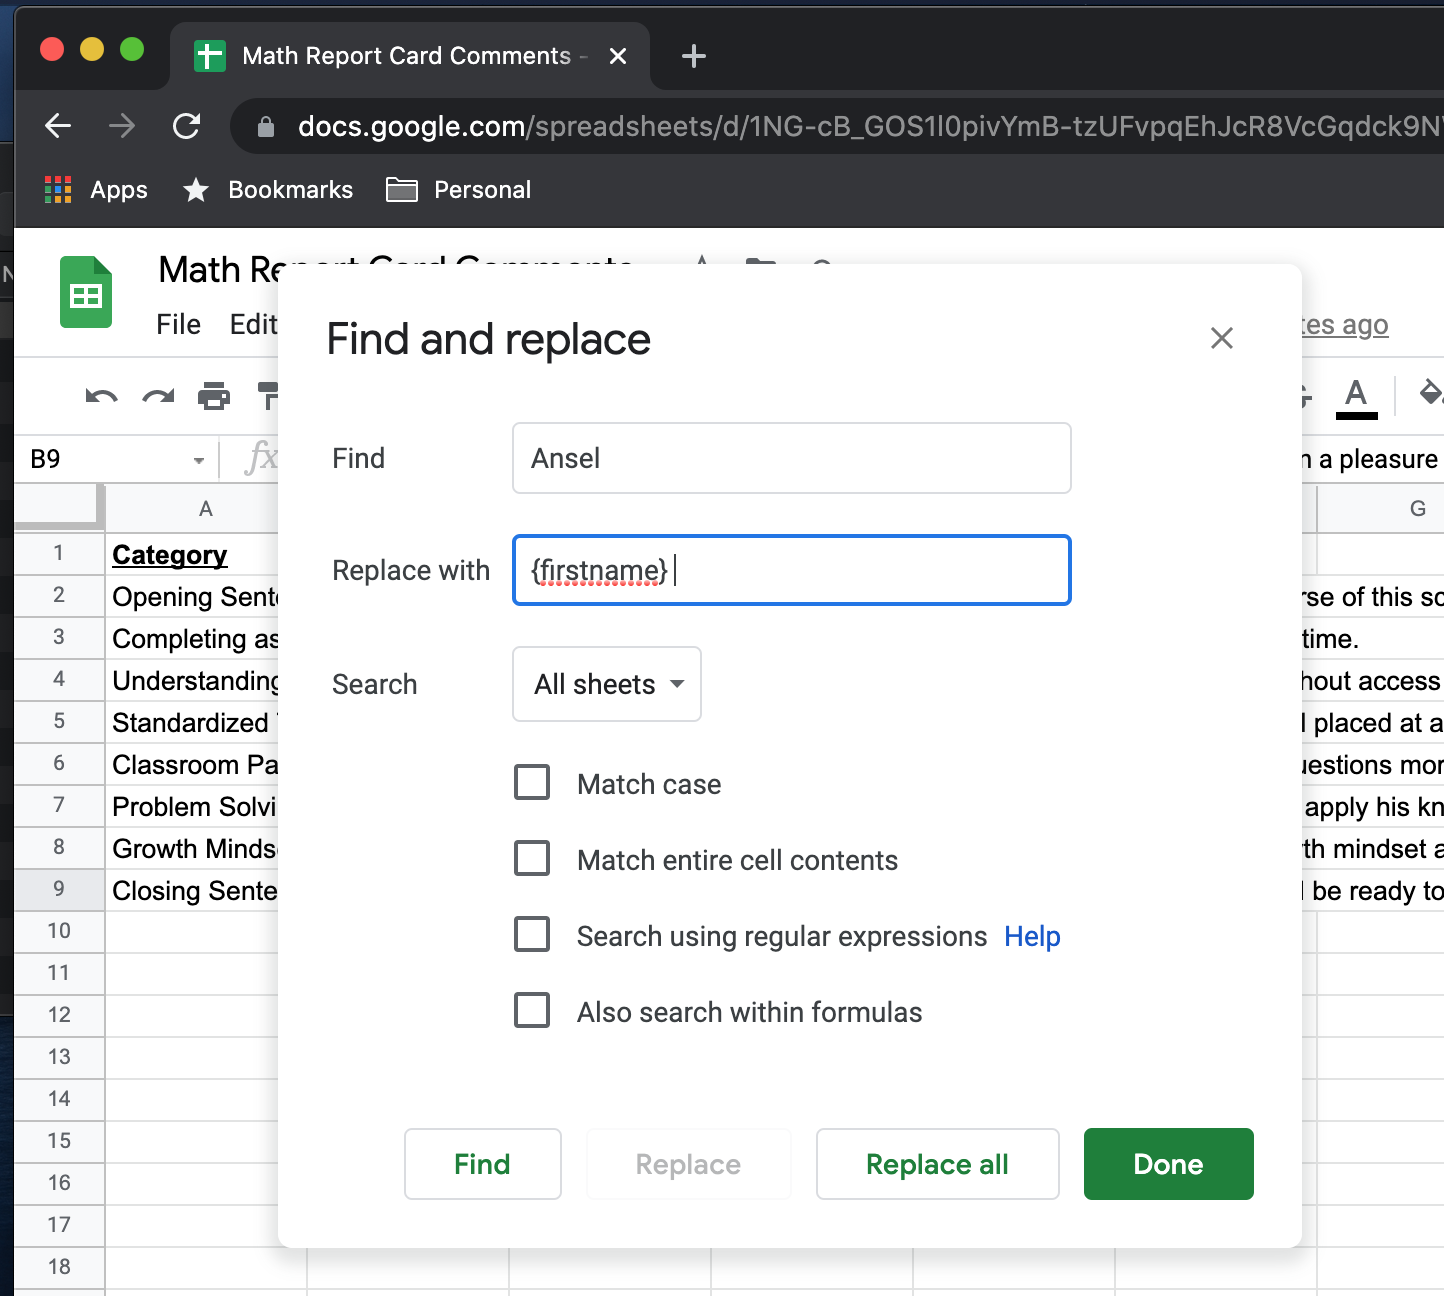
I personally like {firstname} because curly braces aren’t very common in normal writing. You’ll also want to include some spaces before and after your separator, so that you don’t accidentally replace a name that is buried inside another word.
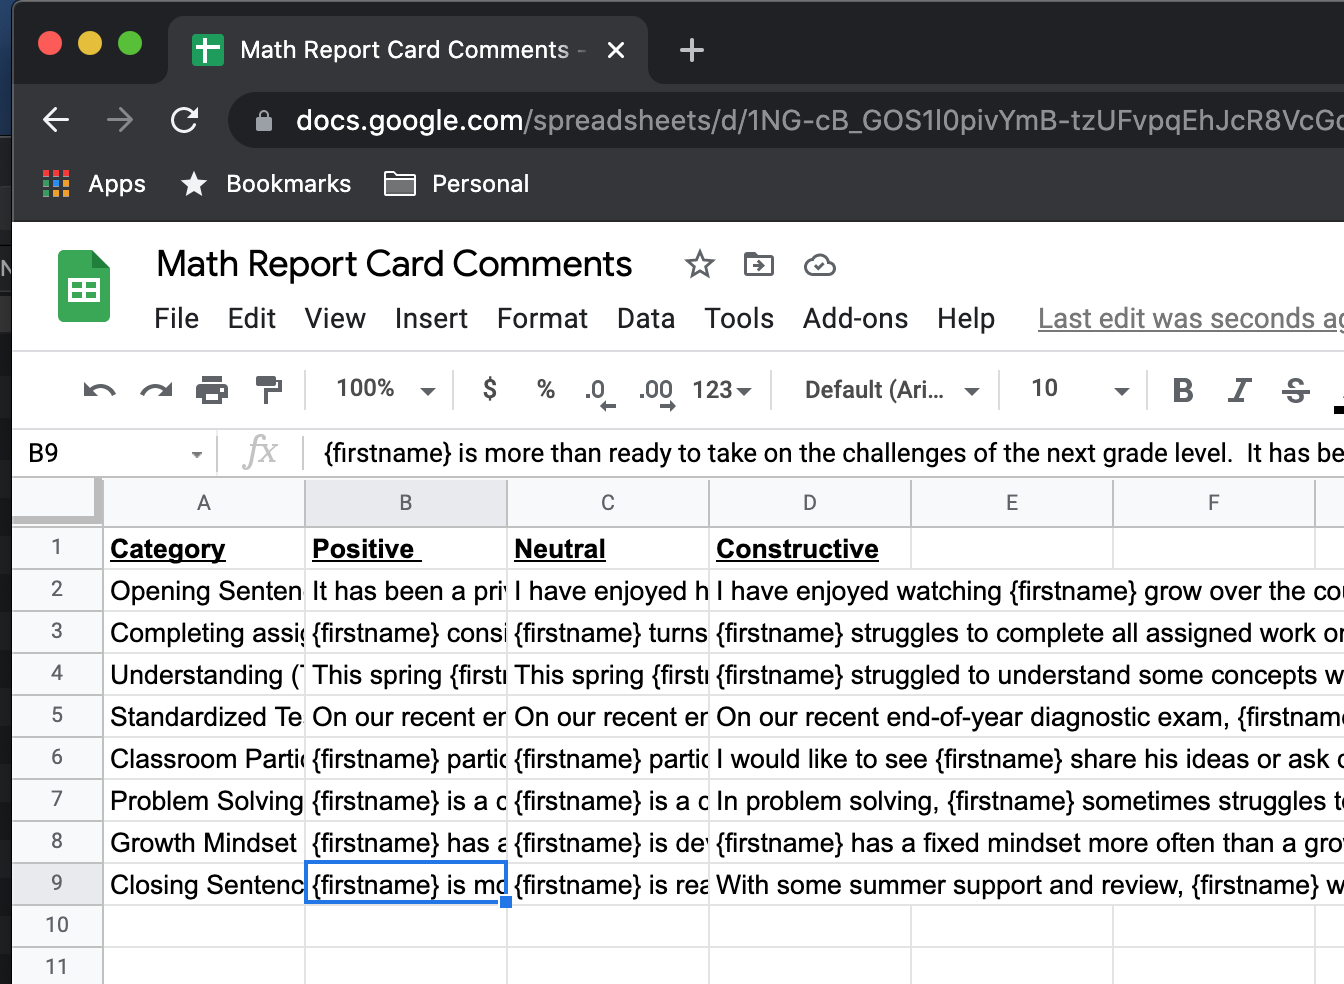
Repeat for each bullet point. Note that this example uses male pronouns. You’ll want to do a separate bit of feedback for your female students, too! This is easy to do with a simple “find and replace” in Excel, however.
Step Five: Start writing reports!
Using a classroom roster as a guide, you can now start writing comments for your students!
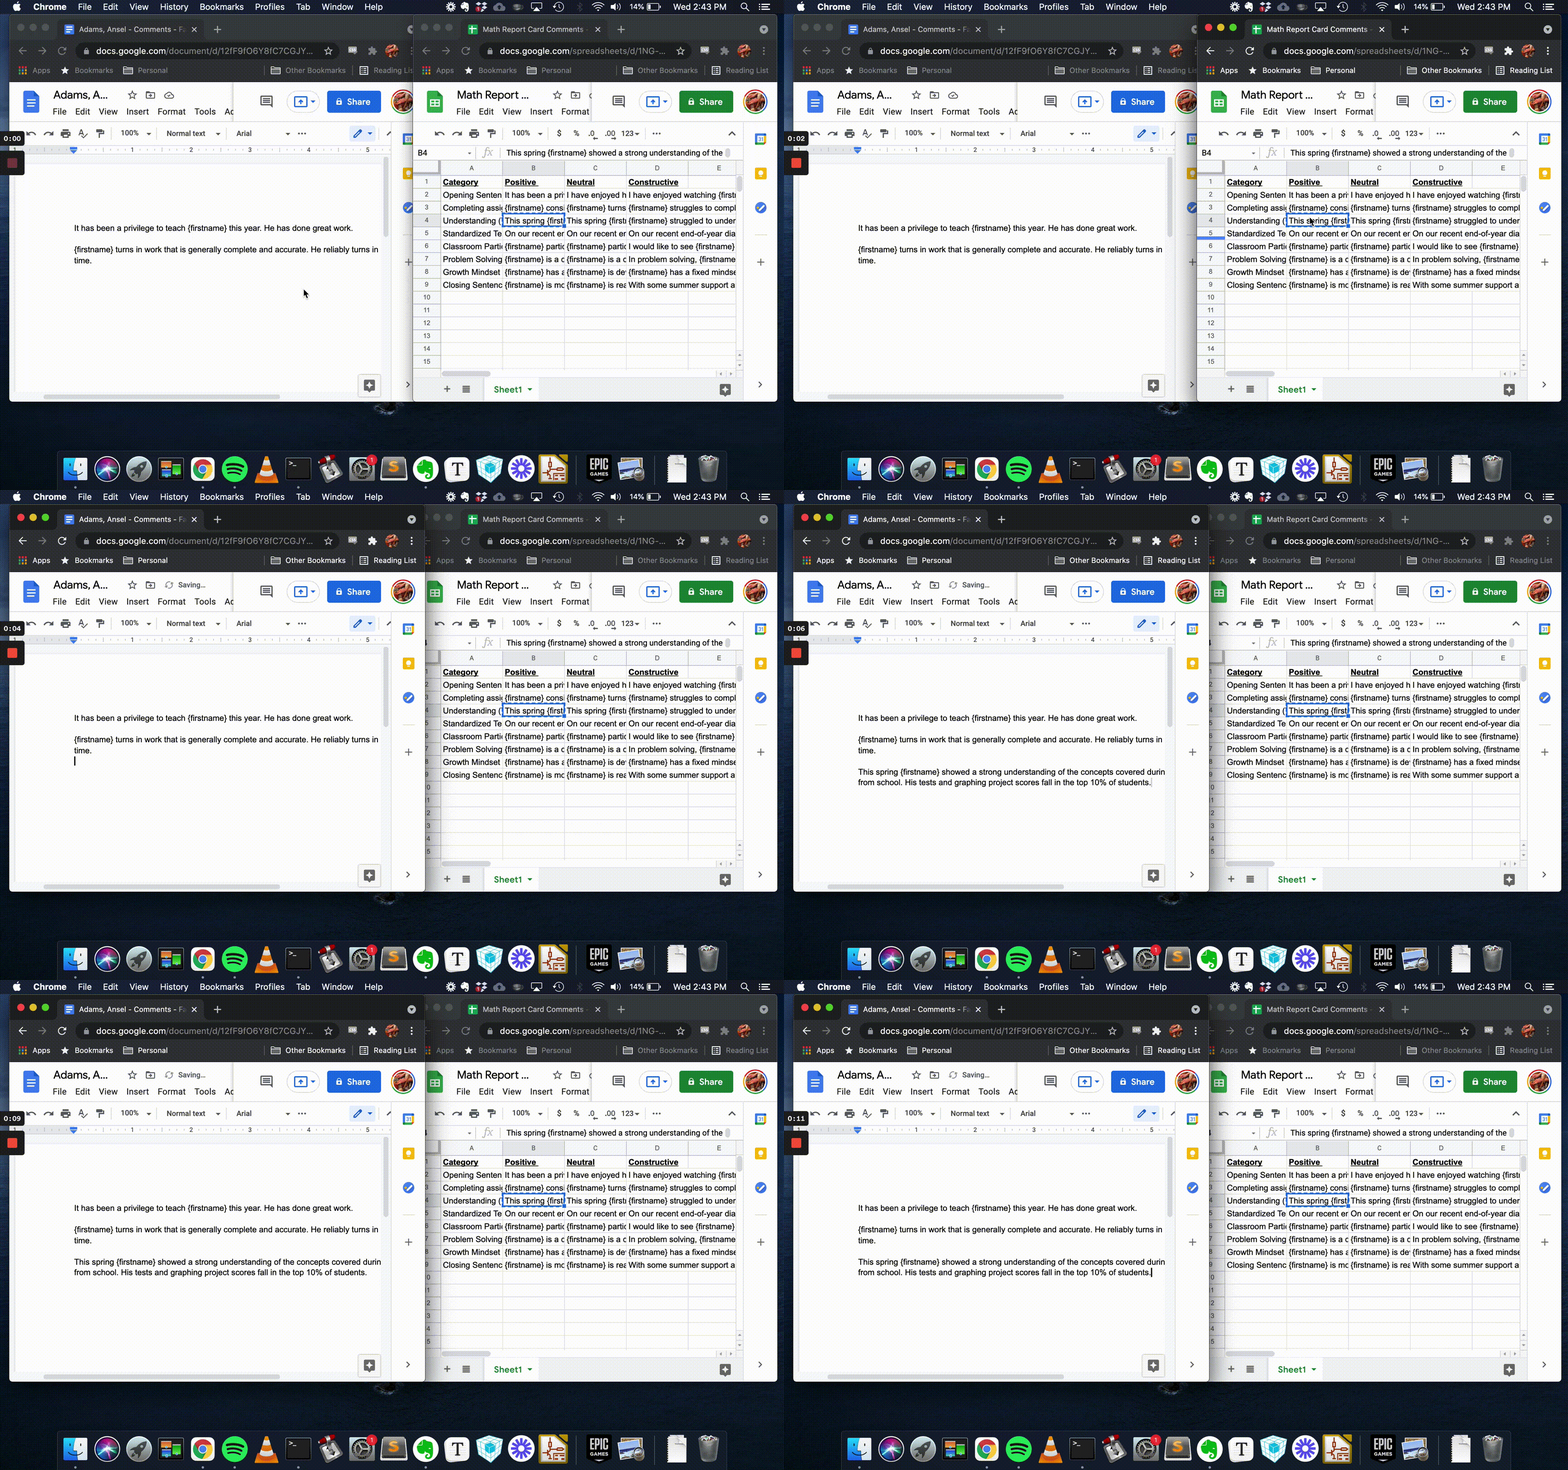
Open up a blank Word document, and save it with a name that indicates the student you’re writing a report for. I like “Adams, Ansel - Comments - Fall 2021” for my format. Go through your template, and use these pre-written comments to populate your Word doc by copy/paste.
Step Six: Customize through Find and Replace.
Once you’ve finished Ansel’s complete report, you can personalize it to him by using “Find and Replace”. Just have it replace “{firstname}” with “Ansel”, and your report will now be personalized to him. Easy!
Step Seven: Proofread and customize
Once you’ve completed your copy + paste, and used Find and Replace to adapt the comments to your student, give your report card comments a good once-over to ensure there are no spelling or grammatical mistakes. Be sure to double check things like pronouns for correctness. This method is great for speeding up comment writing, but it’s not perfect - it’s very easy to slip up and use a misgendered pronoun if you aren’t careful!
This point in the process is a great opportunity to add some specific, personalized feedback for your student. These kinds of feedback offer specific guidance for students. They are most effective when they reference specific moments during the evaluation period leading up to the report card. Comments like this are also a great way to demonstrate a student/teacher relationship. A few examples are:
- “Kenyon did a really strong job of coordinating her project team on the research project this semester.”
- “Samer started out the quarter struggling to complete his math homework, but has shown great strides in his test scores now that he is regularly applying himself to his homework assignments.”
- “Piper shows strong engagement with the reading material. She shone in leading small group discussions on the reading assignments.”
- “I am concerned about Andy’s performance on tests. He has completed all of his assigned homework, but still seems to struggle on exams. Please see me to discuss this further.”
Feedback like this is extremely valuable for students and parents. It demonstrates the value of you, the teacher, and shows a genuine concern for the students under your supervision.
Step Eight: Repeat steps five thru seven for each student.
The template you’ve made for your first student is the raw material you need to easily draft comments for the other students in your classroom. Simply create a new document file for each student, copy and paste the appropriate feedback for each category, and use “Find and Replace”
Step Nine: Send for review!
Once you’ve personalized your report, you are done! All that’s left is to send to the administrators for review and mailing to parents.